


Machine Learning — Logistic Regression
Connect the published Logistic Regression indicator’s Buy and Sell conditions to PineConnector with two TradingView alerts.
Use the existing Buy and Sell conditions in capissimo’s Machine Learning: Logistic Regression publication. This walkthrough keeps the original script; you will create two alerts and supply the PineConnector messages.
Although the publication describes a trading strategy, its Pine implementation is an indicator with named alert conditions. You do not need strategy order-fill placeholders for this setup.
Finish a test alert before introducing the indicator.
- Your License ID and exact broker symbol
Use the symbol shown in MetaTrader, including any suffix.
The risk= value below depends on Volume Type. Add a stop loss if your selected sizing method requires it.
1. Add the original publication
Section titled “1. Add the original publication”Open Machine Learning: Logistic Regression on TradingView and select Use on chart. Choose the symbol, timeframe and indicator inputs you intend to test.
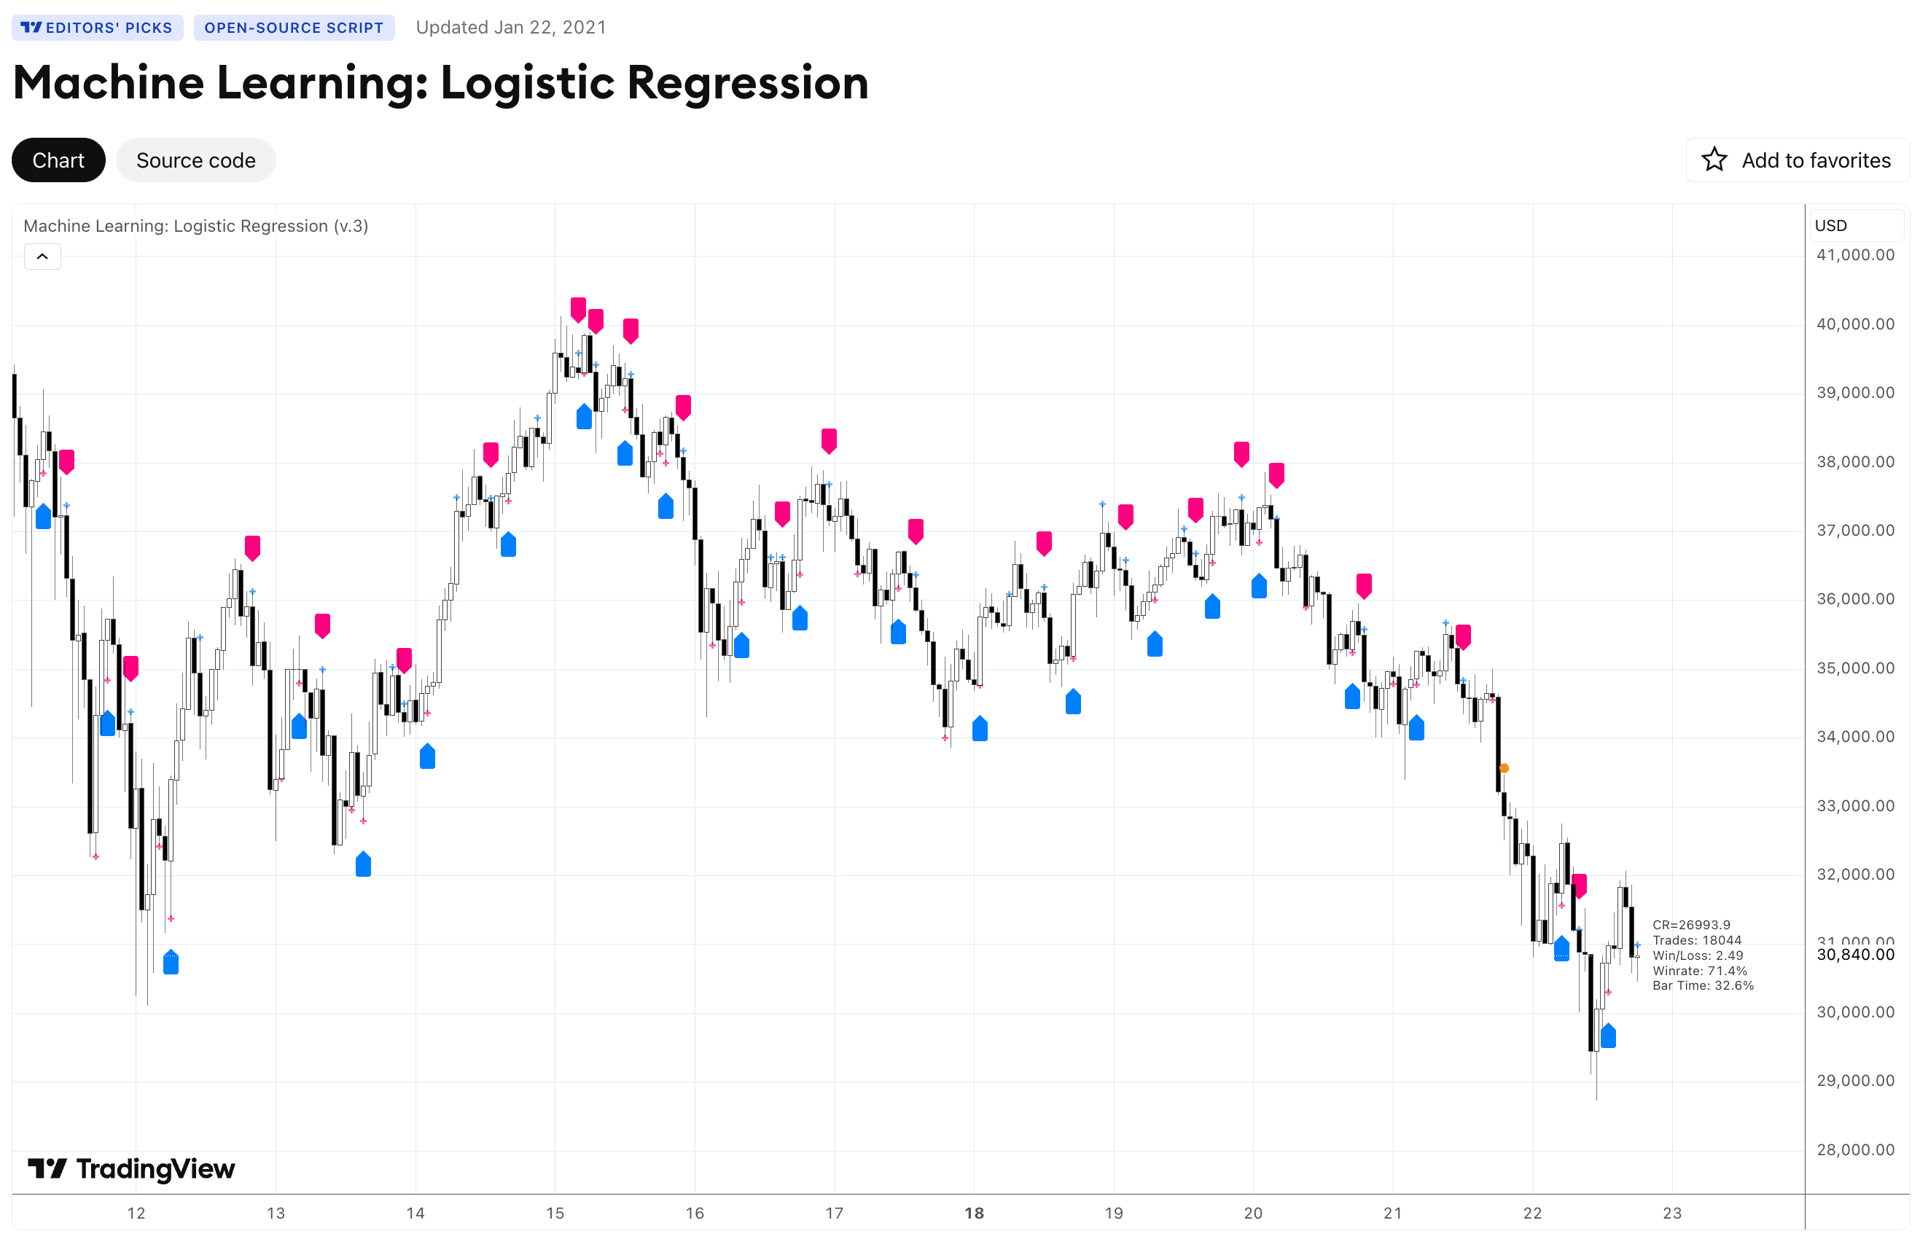
Check that the indicator appears by name on your chart. Open Create alert and look for its Buy and Sell conditions. If both are available, continue to create the buy alert.
2. Review the source or create a working copy
Section titled “2. Review the source or create a working copy”This step is useful if you want to inspect or edit the script; it is not needed merely to use available named alert conditions.
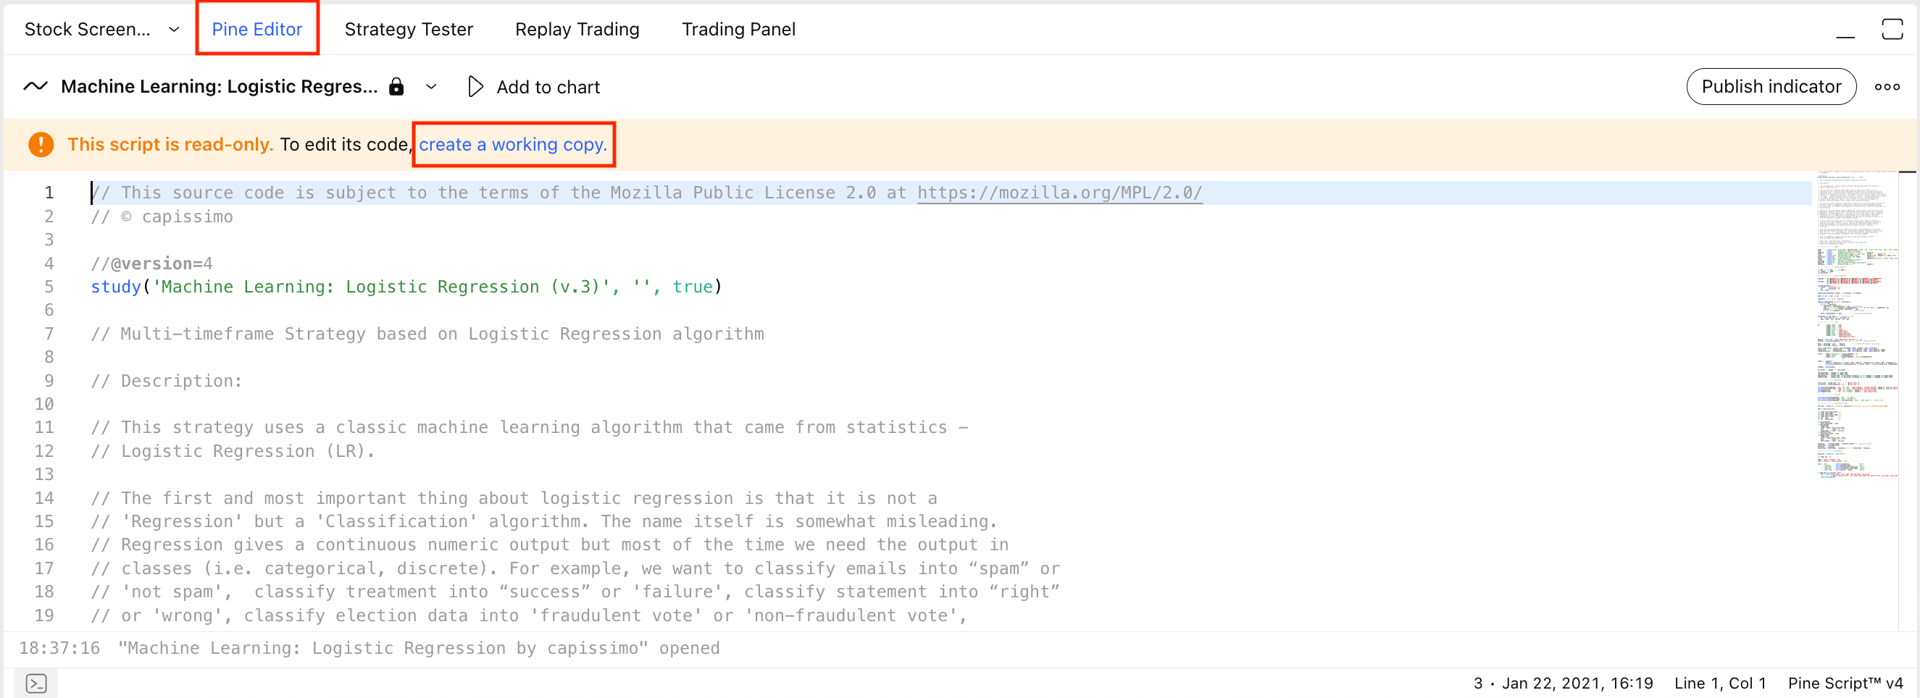
- Open the script’s Source code control.
- In Pine Editor, choose Create a working copy when the source is read-only.
- Save the copy under a recognisable name.
If your copy uses Pine Script v4
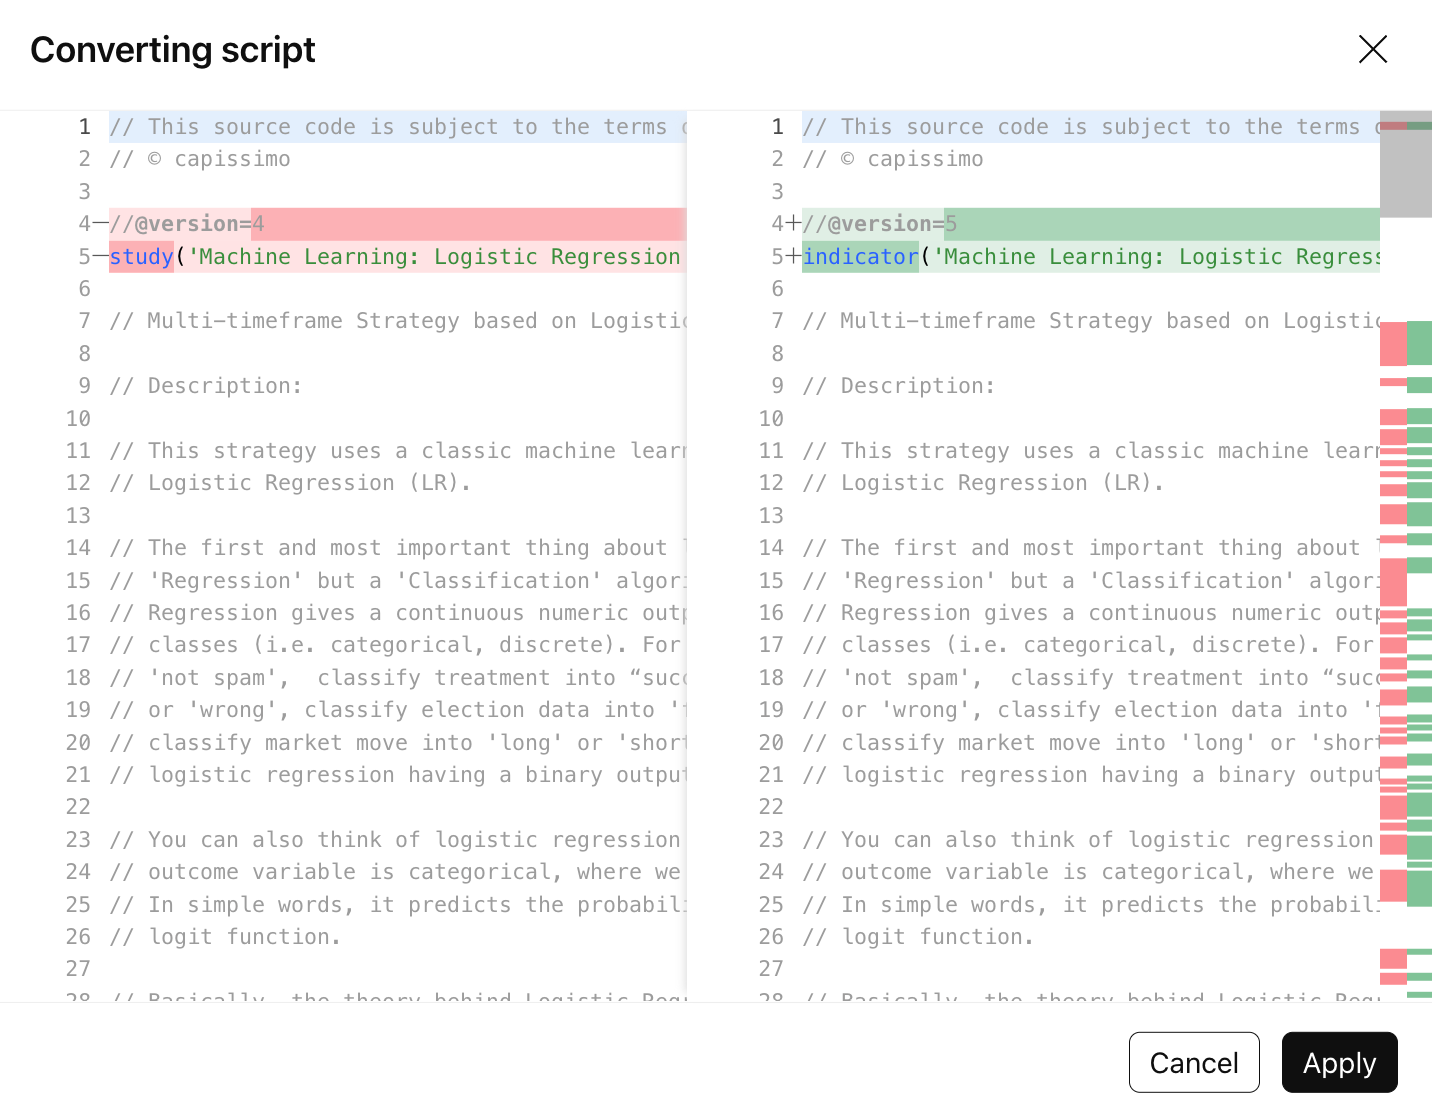
Section titled “If your copy uses Pine Script v4”The original walkthrough converts its v4 copy to v5. Use the editor’s Convert code to v5 action, review the comparison and select Apply. Save and add the converted copy to the chart. If conversion fails, use TradingView’s v4-to-v5 migration guide rather than changing the version number alone.
Find the Buy and Sell conditions
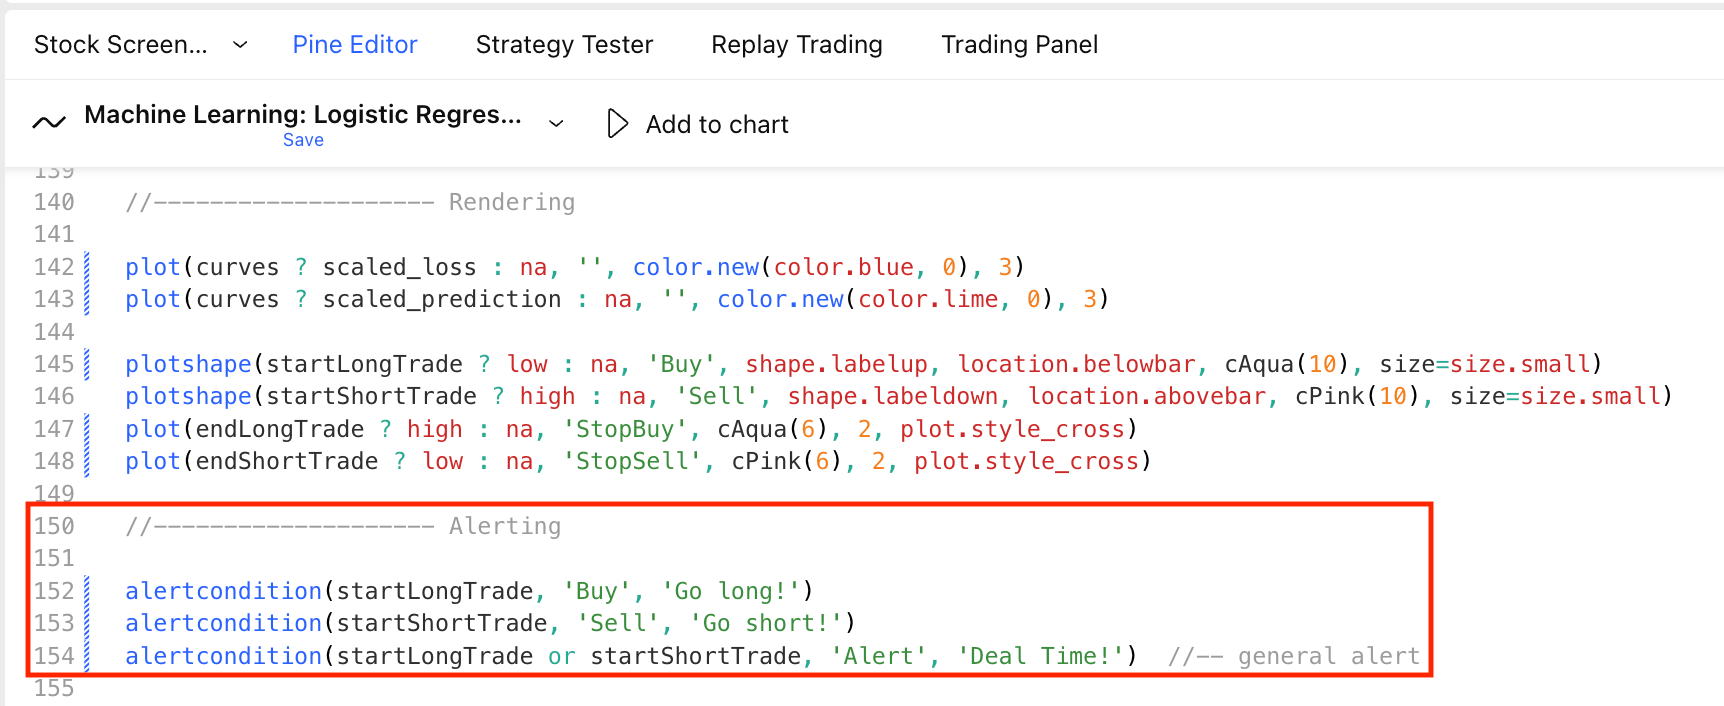
Section titled “Find the Buy and Sell conditions”Search for alertcondition in the source. The published example exposes separate Buy and Sell conditions, plus a general Alert condition. Use the two direction-specific conditions below.
3. Create the buy alert
Section titled “3. Create the buy alert”Select Create alert and configure:
| Field | Choose |
|---|---|
| Symbol and timeframe | The chart you intend to test |
| Condition | Machine Learning: Logistic Regression, or your saved copy |
| Named condition | Buy |
| Trigger | Once Per Bar Close |
| Message | Your buy message below |
This example uses the broker symbol EURUSD and the published risk=1 form. Replace the symbol and choose the risk value appropriate to your EA’s Volume Type. Review any stop-loss requirement before creating the alert.
For the basic messages below, assume Volume Type = Lots and a Setting mode that takes Risk from the signal. Then risk=1 means one lot; change it to your permitted demo size in both alerts. The basic messages do not specify a stop loss. If Signal Authentication is enabled, add your configured secret= privately to each message.
Enable Webhook URL in the notification settings, paste the following and create the alert:
4. Create the sell alert
Section titled “4. Create the sell alert”Create another alert on the same indicator, symbol and timeframe. Select Sell, keep Once Per Bar Close, and use a sell message with the same reviewed settings:
Add the same webhook URL. You should now see two active alerts, one Buy and one Sell. A second alert accidentally left on Buy will not provide the Sell behaviour you intended.
Match the symbol to your broker
Section titled “Match the symbol to your broker”Use a fixed broker symbol for the clearest first test. Once you know the names match, {{ticker}} can use the symbol from the TradingView alert.
TradingView message template
When the ticker is EURUSD
If your broker specifically uses EURUSD-micro, you can use that fixed name or append the same suffix to a matching base ticker:
This suffix is an illustration, not a universal broker format. Check Symbol Mapping when names differ more substantially.
Decide how opposite signals should behave
Section titled “Decide how opposite signals should behave”The guide’s reversal example uses Close on Reverse → On — Hedging. It requests the opposite position to close before opening the new direction. Select it only if that is the behaviour you want, and review its full scope in EA settings.
For self-hosted MT4/MT5, apply the intended inputs to the receiving EA. On Edge, confirm the hosted settings through Portal or Support; an EA on your own computer cannot change the hosted configuration.
These Buy/Sell alerts do not automatically implement every other plot or exit marker in the indicator. Test the resulting positions independently of the chart’s simulated display.
Verify before expanding
Section titled “Verify before expanding”Wait for a new real-time event on your demo setup, then check:
- TradingView: the triggered alert contains the correct direction, License ID, resolved symbol and values.
- PineConnector: the corresponding message appears in the Signals log with its processing result.
- MetaTrader: the intended account has the expected trade size, direction and any stops. Test the opposite signal and check for duplicates.
If the first alert has no corresponding trade, use Missing signals or Errors before adding more alerts.
Optional: use a watchlist
Section titled “Optional: use a watchlist”TradingView can create alerts across a watchlist where the feature and selected condition are available. Use the Symbols selector or the watchlist’s Add alert on the list action; TradingView’s watchlist guide explains the current interface.
Check every symbol mapping first. A fixed EURUSD message would keep requesting EURUSD even when another watchlist symbol triggers. Use a suitable dynamic symbol/mapping, confirm broker availability, and consider the number of simultaneous requests before expanding a successful single-symbol demo.