
Build a PineConnector message
Build and inspect a trading instruction on your chart before connecting a webhook.
Builds on: Your first practice alertNumbers, text and inputs


You will turn a chart event into a readable PineConnector instruction. First, build the message on your chart and check its parts. Connecting it comes later.
The previous lesson compared named alert conditions with alert(). This module returns to the alert() path, where Inputs and code build the message. Neither method is a proficiency level; choose the method that fits the script.
You need to be able to save a script and change its Inputs. Keep any earlier practice alerts paused. You can complete this lesson without a PineConnector account by leaving the destination fields blank.
Put the preview on your chart
Section titled “Put the preview on your chart”Create a separate indicator
Open Pine on the chart’s right-hand toolbar. Open the script-name menu and choose Create new → Indicator.
You have a new starter script, separate from your earlier EMA practice.
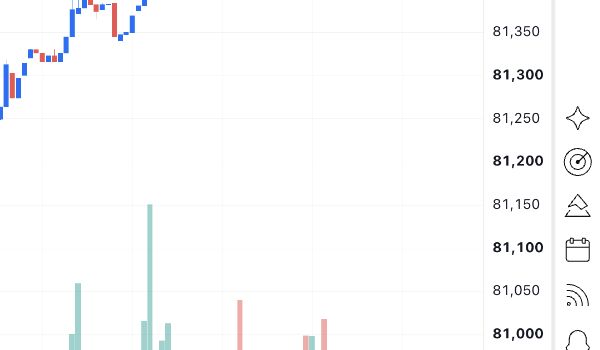
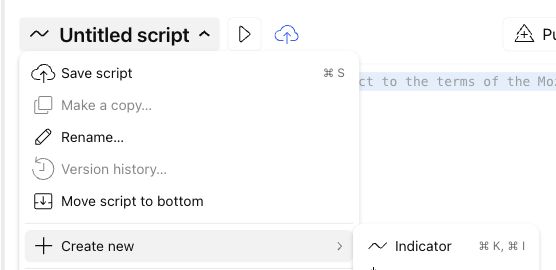
Click Copy below. In TradingView, click inside the starter code, select all with Cmd+A or Ctrl+A, and paste with Cmd+V or Ctrl+V.
Save and add the preview
Save with Cmd+S or Ctrl+S. Name the new file My message practice, then use Add to chart.
Only code is visible? Saving a file does not add it to the chart. Use the triangle-shaped Add to chart control beside the script name.
The chart displays a table headed PREVIEW ONLY · nothing sent.
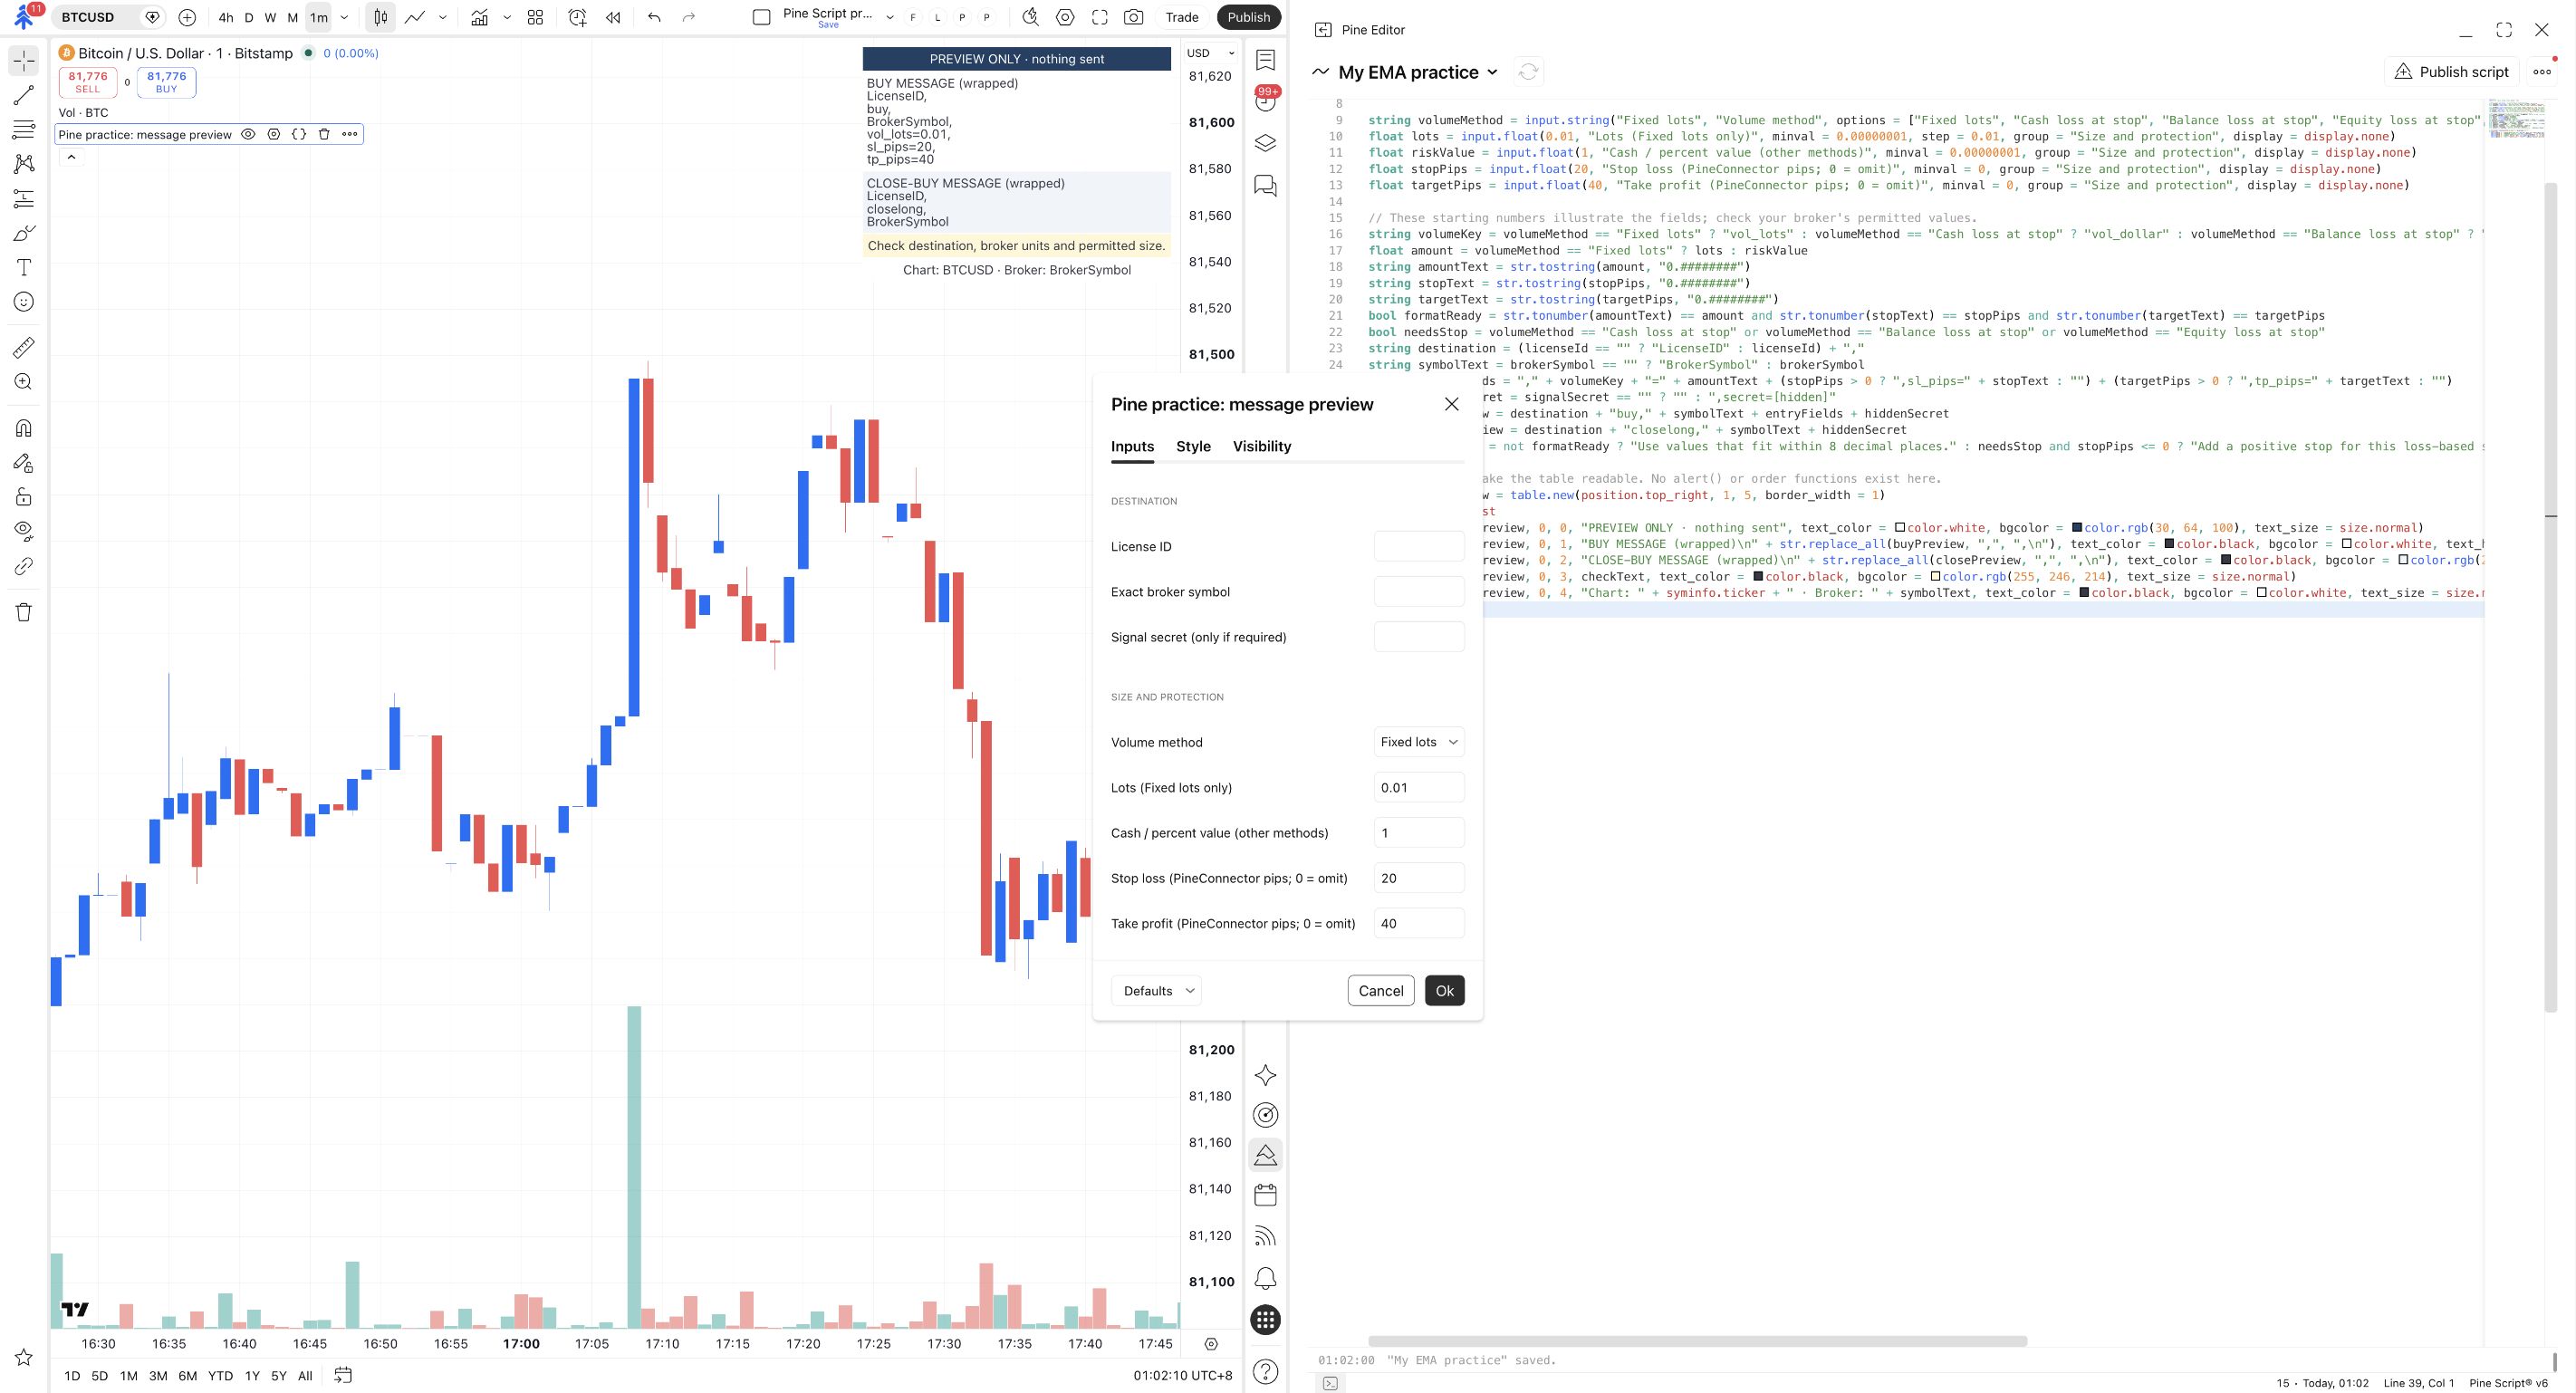
The chart table shows each field on a separate line so you can read it. The commas remain visible. A PineConnector message itself is one comma-separated instruction; you will not paste this wrapped chart table into an alert.
Read the message from left to right
Section titled “Read the message from left to right”| Part | What it tells PineConnector |
|---|---|
LicenseID |
Which connection group receives the instruction. |
buy |
Request a buy entry. |
BrokerSymbol |
Which instrument to trade on the receiving broker account. |
vol_lots=0.01 |
Request 0.01 lots, if that volume is permitted. |
sl_pips=20,tp_pips=40 |
Request the illustrated stop and target distances. |
Pine Script builds the text. PineConnector Syntax is the format of that text. A correctly formed message is still only a request; it does not prove that a broker accepted an order. Message structure
Open the preview's Inputs
Hover over Pine practice: message preview in the chart’s indicator list. Click its Settings gear, then open Inputs.
Leave License ID, Exact broker symbol and Signal secret blank for the first exercise.
You can see Destination and Size and protection settings.
Blank destination fields produce the visible placeholders LicenseID and BrokerSymbol. That is expected in this preview. They are not valid values for a connected trading alert.
Choose the intended destination
Section titled “Choose the intended destination”Find the receiving License ID
If you have a PineConnector connection, open Portal → Connections. Find the License ID used by your intended demo account and inspect the accounts listed beneath it.
Copy that License ID into the preview indicator’s License ID input. Do not use the broker account login or password.
No connection yet? Leave the input blank. You can finish the preview exercise and return to connection setup before the demo lesson.
You can identify every account that would receive a message addressed to that ID.
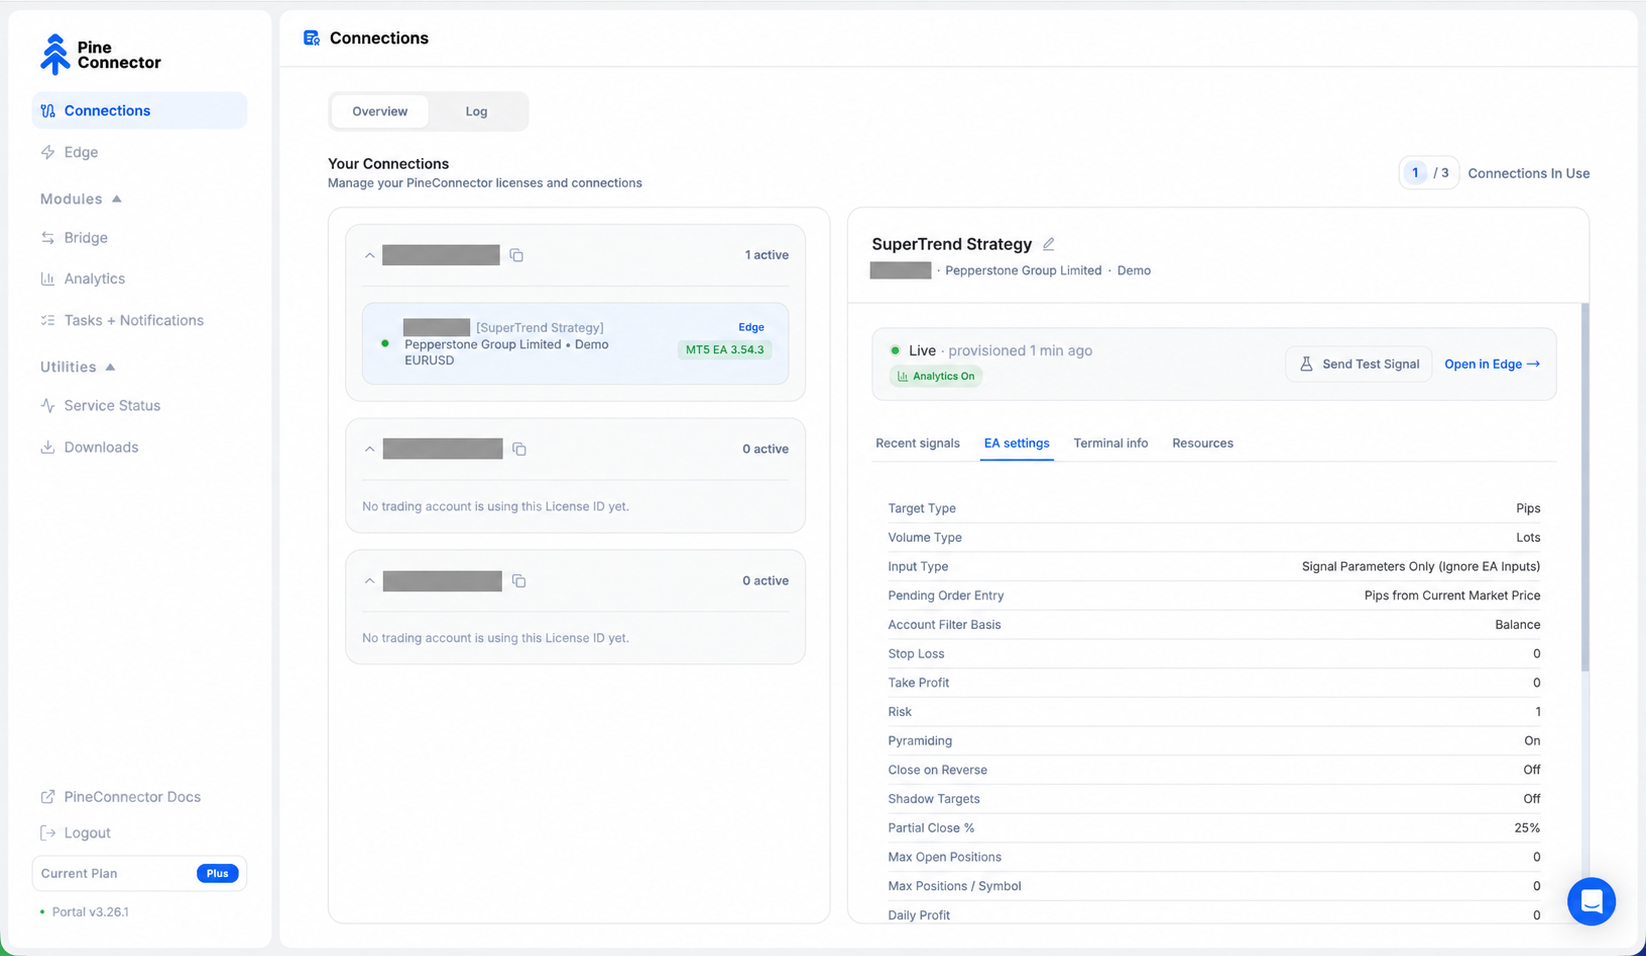
One ID can reach several accounts. A demo account beside a live account in the same group is not an isolated demo destination. Resolve the account selection before enabling delivery. License IDs and connections
Find the exact broker symbol
Open the intended broker account in its supported MT5 app or terminal. On desktop MT5, press Ctrl+U to open Symbols and read the Symbol column.
Put that exact name in Exact broker symbol. For example, a broker may use EURUSD.i rather than EURUSD. This example does not tell you which name your broker uses.
The message identifies the broker instrument, including its complete spelling and suffix.
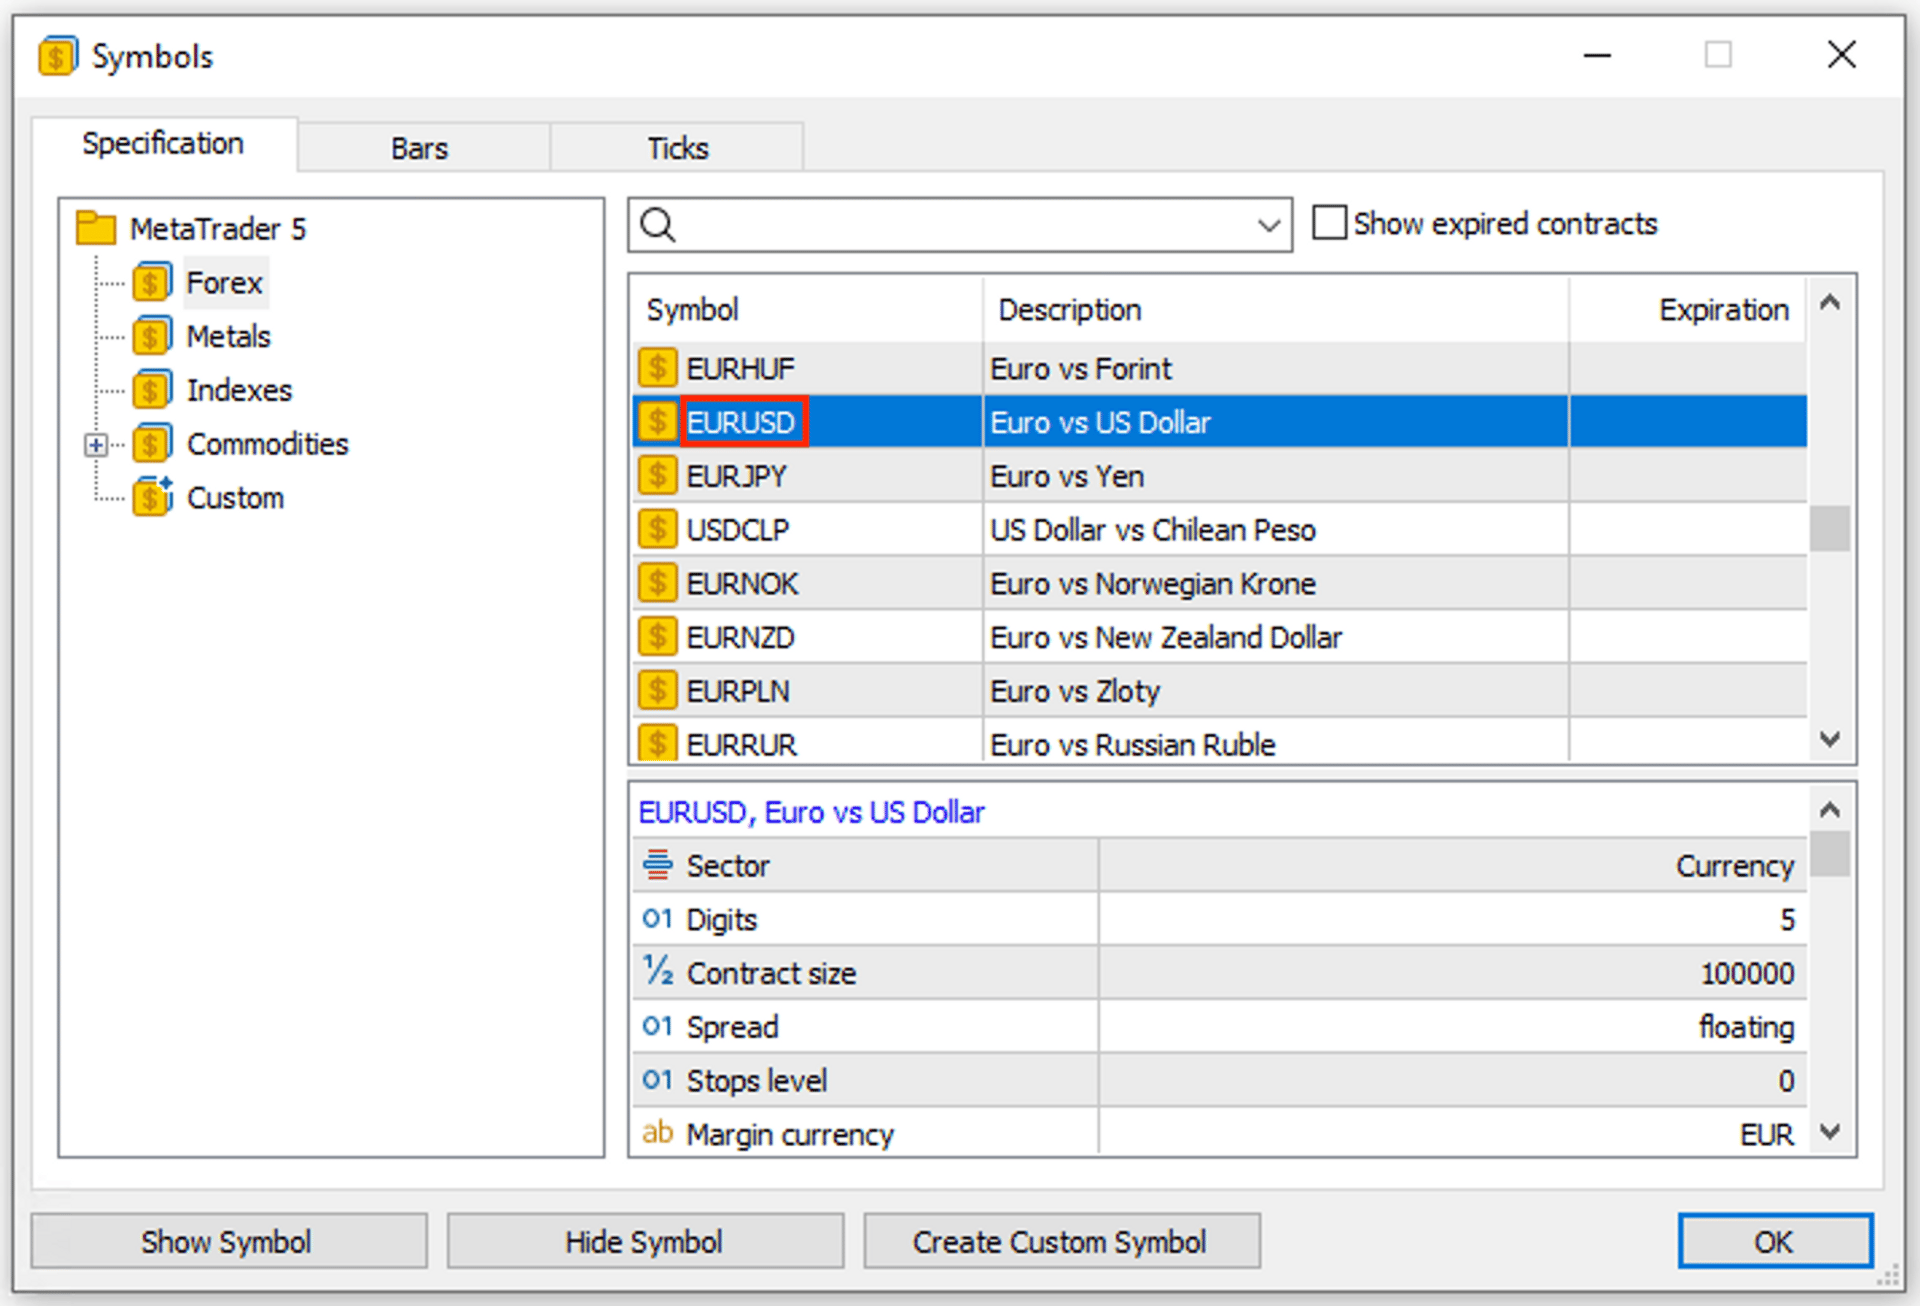
The TradingView chart ticker and broker order symbol are separate. This script deliberately asks you for the broker name instead of assuming that syminfo.ticker is correct. If you already use Symbol Mapping or EA Prefix / Suffix, review the final symbol path before adding another transformation.
Check both preview messages
Click Ok to close Inputs. Read the chart table from top to bottom. The buy message contains size, stop and target fields. The close-buy message uses closelong and does not contain entry-size fields.
If Signal Authentication is already enabled for this destination, enter the matching secret privately in TradingView. The table shows secret=[hidden]; this display cannot verify that you entered the correct secret.
The buy and close-buy messages use the same intended destination and broker symbol.
Keep your saved script, Inputs and screenshots private once they contain your connection details. The downloadable course file contains blank values; entering a secret in TradingView does not change that public download.
Try it yourself
Section titled “Try it yourself”In this preview-only script, enter EURUSD.example as the broker symbol, then click Ok. Do both message previews change? Does the chart ticker change?
Check your answer
Both messages should now contain EURUSD.example. The chart ticker stays the same because you changed the message destination, not the chart. This invented example symbol is for the exercise only. Restore your verified broker symbol, or leave the field blank, before continuing.
Before you move on: explain the difference between License ID, broker login and broker symbol without looking at the table. Then continue to the size and protection lesson before creating a connected alert.